 iTell
1
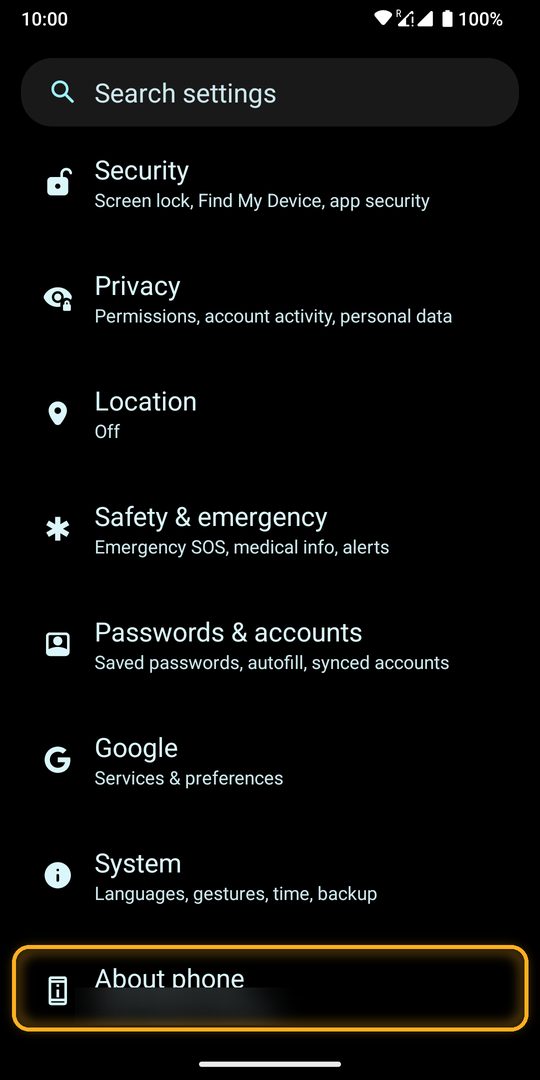
Open Settings, then About phone
Scroll to the bottom of Settings and tap About phone. On some phones it's called About device.
The one-time part: turn on Developer options, switch on Wireless debugging and type a six-digit code into iTell's notification. About five minutes, with pictures.
In iTell's setup, the “Developer options” step has an Open button and the “Pair with Wireless debugging” step has a Start button. They open the right Settings page for you. This page is for when you want to see what's coming, or you're stuck.
Screens are from an Android 13 phone. Colors and some names differ on yours; the order is the same.
Hidden by default. Android shows them after you tap one line seven times. You do this once.
Scroll to the bottom of Settings and tap About phone. On some phones it's called About device.
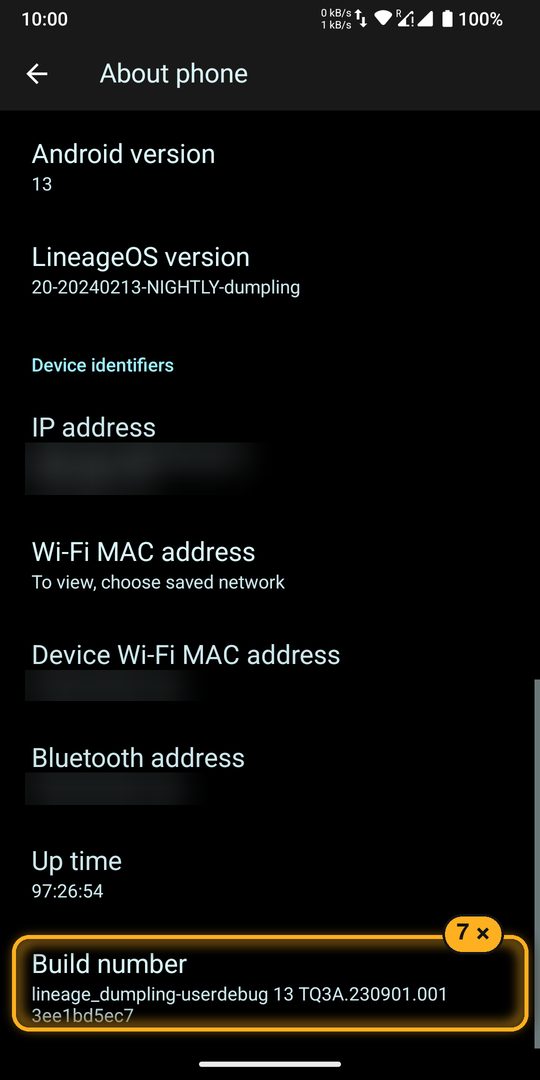
Scroll to the very bottom and tap Build number quickly, seven times. Android may ask for your screen lock. A short message says you're now a developer.
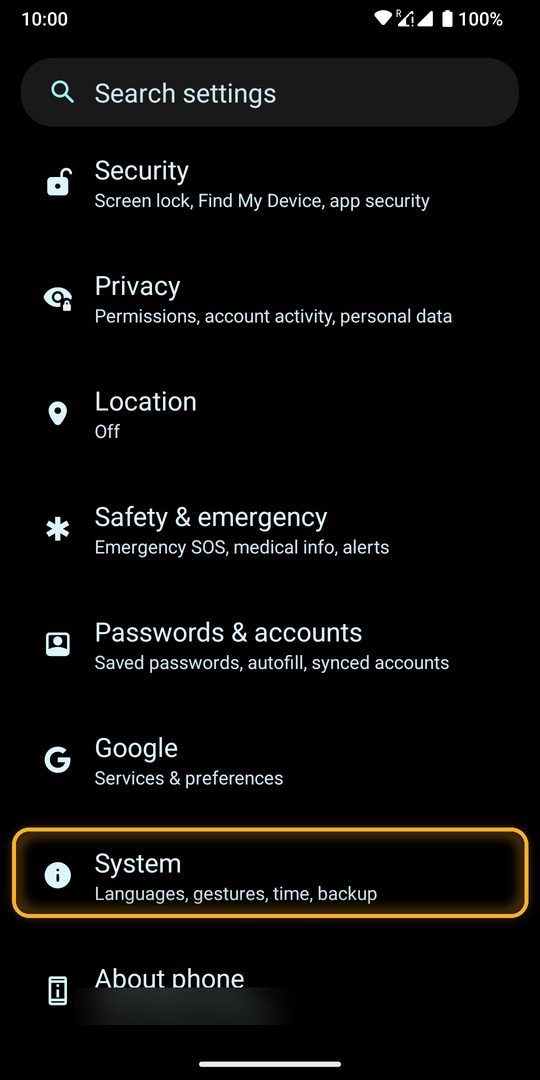
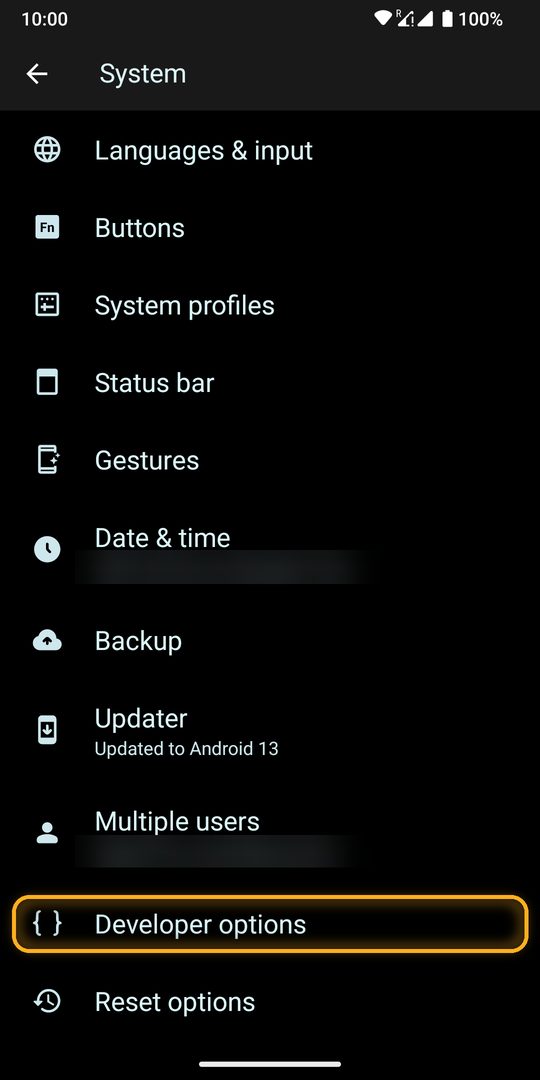
Go back to Settings, tap System, then Developer options. The switch at the top, “Use developer options”, must be on.
This is the tricky part, so we've cut it into small steps. Take them one at a time and don't close the code window.
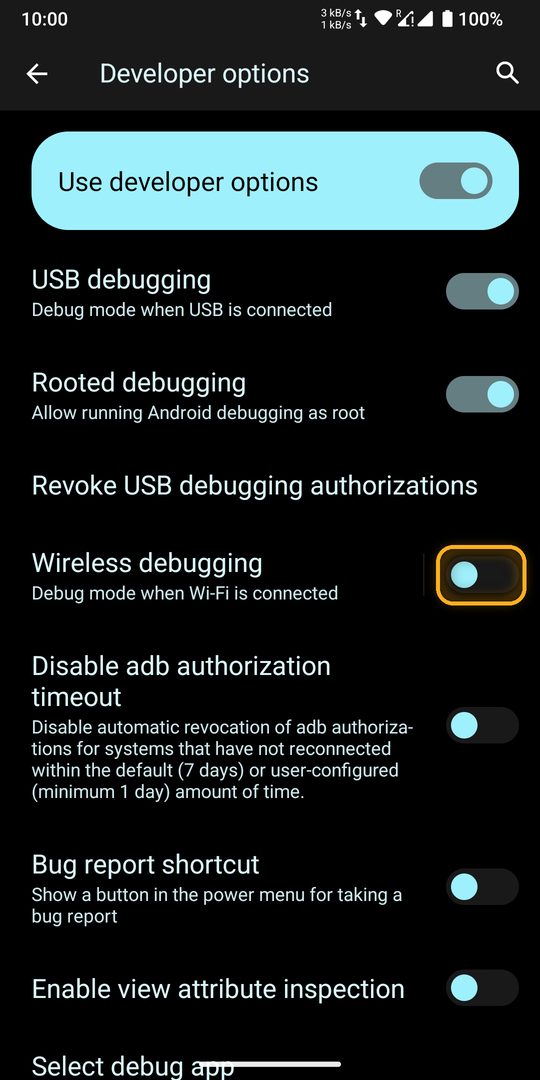
Make sure you're on Wi-Fi. Scroll down to the Debugging section and switch on Wireless debugging. If Android asks “Allow wireless debugging on this network?”, tick “Always allow on this network” and tap Allow.
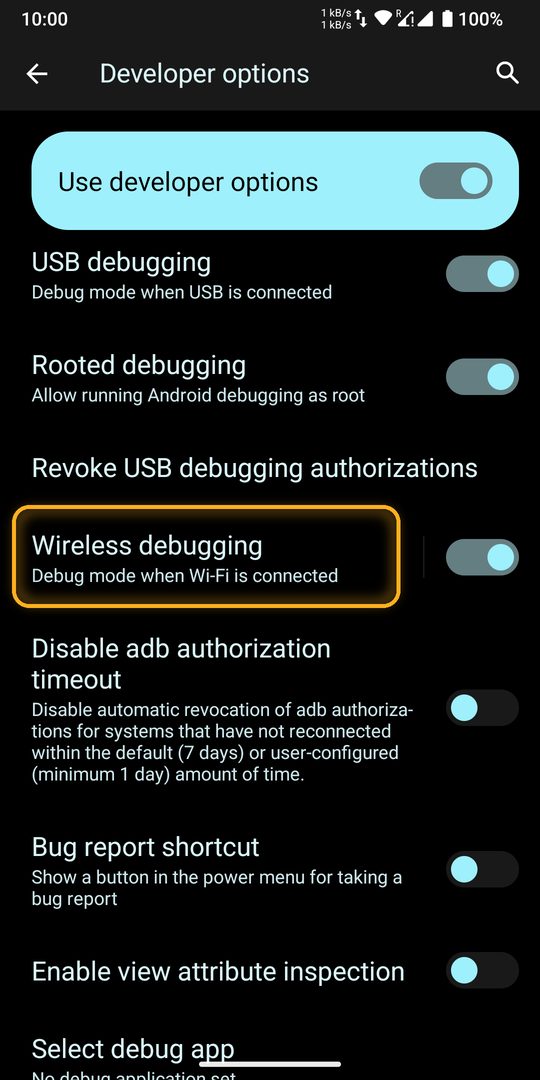
Tap the name, not the switch. A page opens with the device name and a few options.
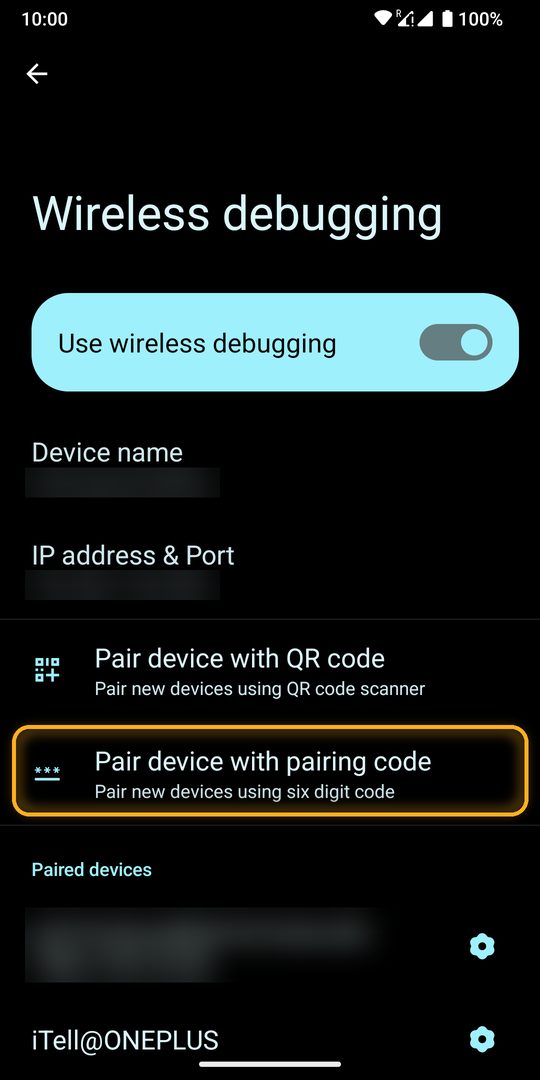
Not the QR code one. It's right below.
A window shows a Wi-Fi pairing code. Don't tap Cancel and don't press Back: it has to stay open for the next step. The code works only while the window is open.
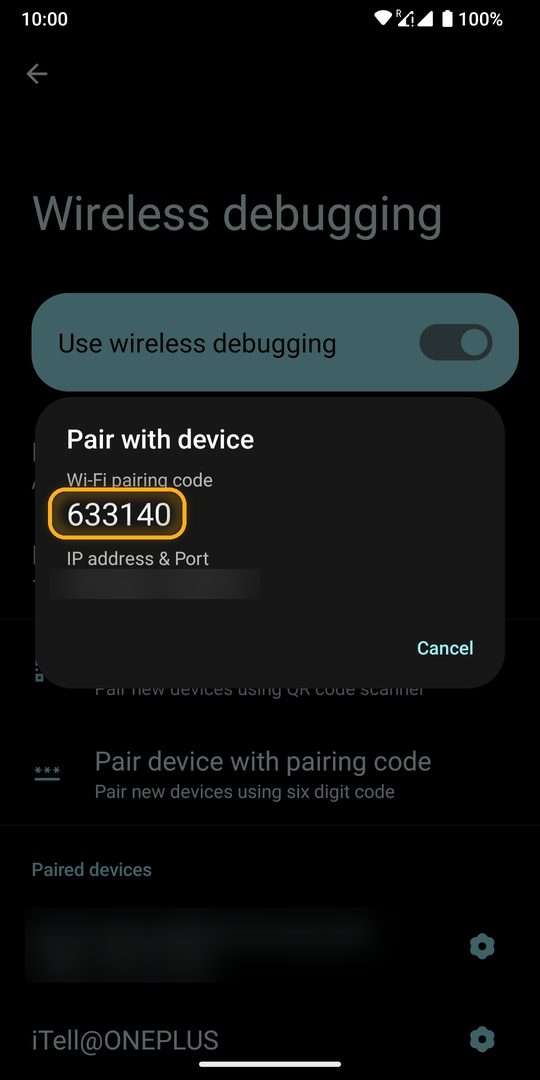
Swipe down from the top of the screen. iTell's notification “Type the pairing code” has a field: type the six digits and tap Pair. The code window stays open underneath.
 iTell·now
In Wireless debugging tap “Pair device with pairing code”, keep that window open and type the 6-digit code here.
In a few seconds the notification changes to “Paired” and iTell starts the call-audio helper. You can close Settings. Leave Wireless debugging on.
iTell·nowiTell is starting call audio. You can close Settings.
Names move around between makers. If you get lost, search Settings for “Build number” or “Developer options”.
| Phone | Build number | Developer options |
|---|---|---|
| Pixel, Motorola, Nothing, most stock Android | Settings → About phone → Build number | Settings → System → Developer options |
| Samsung | Settings → About phone → Software information → Build number | Settings → Developer options (bottom of the main list) |
| Xiaomi, Redmi, POCO | Settings → About phone → tap OS version (or MIUI version) | Settings → Additional settings → Developer options |
| OnePlus, OPPO, Realme | Settings → About device → Version → Build number | Settings → Additional settings (or System & updates) → Developer options |
Android doesn't let ordinary apps near the sound of a phone call. Wireless debugging is Android's own way to hand a small helper that permission, and only after you type a code shown on your own screen. You do it once. No computer, no cable, and the pairing never leaves the phone.
Tap Build number seven times first (steps 1 and 2). Then look for Developer options under System, Additional settings, or at the bottom of the main list. Searching Settings for “Developer” is quicker.
It needs Wi-Fi. Connect to a Wi-Fi network (mobile data alone isn't enough) and try again. Turning Wi-Fi off and on once often fixes it.
Tap “Pair device with pairing code” again and type the new code. You can't pair with a closed window, and every window has its own code.
Type the six digits from the window that's open right now. If you opened it twice, the older code is dead. Digits from any keyboard work.
Pull the notification all the way down and tap Pair; the field opens. If there's no iTell notification at all, allow notifications for iTell in Settings → Apps.
No, leave it on. Turning it off can stop the call-audio helper. After a restart, iTell switches it on by itself once the phone is on Wi-Fi.
Not after a restart or an update. Only if you uninstall iTell, remove its entry under Paired devices, or reset the phone.
Back in the app, setup shows a tick and then the QR code for your iPhone.
Back to download